Best Sephiria Builds
Plan Sephiria builds by combining weapon enhancements, artifact combo tags, slabs, talents, and hard mode goals.
Quick answer
The best Sephiria build is the one that commits early. Pick a weapon enhancement, choose one main damage family, then use artifacts, slabs, and talents to make that plan stronger instead of collecting unrelated upgrades.
New to builds?
Do not copy a full build before you understand what the route is trying to do. For your first few days, copy the idea first, then let drops decide how close the run can get.
| Build idea | What to copy first | Good early sign |
|---|---|---|
| Freeze control | A weapon path or artifact family that repeatedly adds ice, frostbite, freezing, or Glacier support. | Rooms feel safer because enemies are slowed, frozen, or interrupted more often. |
| Defensive sustain | Guard, defense, lifesteal, Guardian, Firmness, or safer counter play. | You survive longer without giving up every damage choice. |
| Ranged safety | Crossbow spacing, staff range, projectiles, or effects that keep damage moving while you reposition. | You can keep pressure on enemies without standing inside every attack. |
| MP casting | Lake, Academy, spellbook support, MP recovery, or cheaper special usage. | The build still works after a long room instead of running out of MP immediately. |
If the first two or three rewards do not support the idea, switch to the strongest working part of the run instead of forcing the original plan.
Featured builds
These are the named routes worth showing first because the material includes a weapon path, a goal, and a version context. Treat older patch routes as starting points for planning, not as proof that every number is unchanged.
| Build | Best for | Weapon path | Version context | Main risk |
|---|---|---|---|---|
 Frozen Smelt Frozen Smelt | Low-input freeze control and safer room handling. | Dagger -> Sleeping Frost -> Frozen Smelt | 1.0.24 recipe | Needs Wings-lost Bat and enough Glacier support to stay coherent. |
 Formless Dance Formless Dance | Ranged evasion with staff-based spacing. | Staff -> Throwing Spear -> Formless Dance | 1.0.24 recipe / 1.0-era video variant | Recovery and evasion must keep up or the route loses its safety. |
 Minigun Minigun | Sustained ranged fire and boss pressure from distance. | Heavy Crossbow -> Unstable Lightning Mark -> Minigun | 1.0 launch-era video | Later MP behavior changed, so do not build around outdated infinite-fire assumptions. |
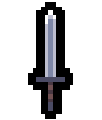 Guardian Greatsword Guardian Greatsword | Forgiving defense, lifesteal, and beginner-friendly stability. | Steel Greatsword -> Bone Mechanism Sword -> Creaking Spine | 1.0.23 community favorite | Can become too defensive if it does not add efficient damage. |
| Infinite Elemental Bolt | Homing caster play built around a staff route. | Staff -> Flame Staff -> Elemental Fusion Staff Ilonica | 1.0.24 recipe | Splitting across too many elements can leave the bag full of weak pieces. |
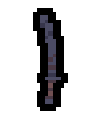 Biryuu Katana Biryuu Katana | Large-area normal attacks and crit scaling. | Katana -> Sword-Arc Blade: Cheongwangsak -> Sword-Arc Blade: Biryu | 1.0.24 recipe | Firmness and Precision need to carry damage without overpromising guaranteed crits. |
If a core piece does not drop
Good runs do not always become the build you planned. Protect the part that already works, then stop spending slots on pieces that only matter if the missing artifact appears.
| Planned route | Missing piece | Keep if | Pivot toward |
|---|---|---|---|
| Frozen Smelt | Frost Relic | Glacier damage and control are already active. | A smaller Glacier / Precision dagger route. |
| Formless Dance | Six-leaf Clover | Evasion is rising through other Shadow pieces. | Recovery, evasion, and ranged Firmness / Precision. |
| Minigun | MP support after the Brass Mirror fix | Guardian or Magitech support keeps controlled bursts working. | MP regeneration, absorption, or a burst crossbow route. |
| Guardian Greatsword | Rock Elephant | Guardian 10 and Bloodstone-style sustain are stable. | Efficient Firmness or direct damage while keeping the defensive shell. |
| Infinite Elemental Bolt | Triple Bolt or caster core | One element plus Academy is already strong. | The strongest single-element staff package. |
| Biryuu Katana | Pride | Firmness and general Precision already deal enough damage. | Standard Firmness / Precision katana. |
Build checklist
| Step | Decision | Example |
|---|---|---|
| 1 | Choose the weapon job. | Guard, heavy cleave, Fury, ranged, magic, dash, or counter. |
| 2 | Pick the first enhancement only if it supports that job. | Frost Shard for ice, Incendium for fire, Reloader for high-hit crossbow. |
| 3 | Aim for one combo family. | Glacier for frostbite/freezing, Lake for MP, Embers for burn, Dark Clouds for lightning. |
| 4 | Place slabs around your best artifacts. | Raise the artifacts that define the route; move penalties to harmless spaces. |
| 5 | Spend talents to cover the weak point. | Survival for health, Patience for defense, Wisdom for MP, Fast for attack rhythm. |
| 6 | Re-evaluate before hard mode. | Hard mode modifiers punish unfocused damage and weak defensive planning. |
Talent planning
Talent points are not just permanent upgrades. They decide what kinds of builds feel smooth:
| Talent | Use it when | Build fit |
|---|---|---|
| Anger | You need critical chance. | Greatsword crit, Thorn Bat, final-hit builds. |
| Fast | Your weapon scales with attack speed or needs smoother attack gaps. | Sword auto-guard, dagger, Acceleration Core, katana quick slash. |
| Survival | You are losing runs to mistakes before the build comes online. | New players, hard mode climbing, companion routes. |
| Patience | Defense is part of the damage or guard plan. | Guardian builds, Bone Greatsword, Cutlassfish, Staff counter. |
| Wisdom | MP is the limiting resource. | Shield sweep, special attack spam, spellbooks, Lake routes. |
| Will | You want more luck and long-term consistency. | Artifact hunting and routes that need specific pieces. |
| Base | You want combo and inventory flexibility. | Artifact-heavy routes and slab puzzle builds. |
Hard mode planning
Hard mode unlocks after progression through Destiny and gives scored modifiers. Clearing levels grants additional talent points, but stage rewards must be cleared in order. That makes hard mode a progression loop, not just a difficulty toggle.
Enter hard mode with a focused build, not with a generic pile of stats. Before turning on harder modifiers, make sure the route has damage scaling, survival, and a clear answer to boss pressure.
Next guide path
Use these pages after choosing a build route:
- Weapons Guide: check which enhancement commits the run.
- Artifacts & Slabs: place the items that support the route.
- Combo Family Guide: compare damage families and support tags.
- Boss Route Guide: prepare for the stage problem before entering the room.
Common build mistakes
Avoid these traps:
- Picking rare artifacts that do not match the weapon.
- Splitting between fire, ice, lightning, companion, and spellbook routes at the same time.
- Taking slab penalties that disable the best item in the inventory.
- Entering hard mode before the run has a real boss-damage plan.